Short answer: you send each student a hand-off code; they claim it into their own free account, rent a GPU, paste one restore command, and the files and dependencies come back, checked, and the workflow runs. One run we measured took four minutes from pasting the command to a finished picture. This is a planning guide, not a report from a class: nobody has taught a course this way with Renest yet, and we won't pretend otherwise.
What we measured
We handed a showcase setup (three node packs, an IP-Adapter, a depth adapter, CLIPSeg; 7.96 GB) to a second, free account. The second account claimed it, signed its own restore code and pasted it into a freshly rented RunPod RTX A6000. The machine was ready about a minute after we ordered it (69 seconds, including pulling the image). The restore took 251 seconds from pasting to a finished test render, which produced four pictures. The full run is in Reference image, depth and a text mask in one workflow.
A restore of a similar nest on an RTX A5000 took 165 seconds, after a 60-second boot.
How long a student takes to go from nothing to a running machine also depends on things we haven't timed: signing up for Renest, signing up for RunPod, adding a card and credit, and, for some models, accepting a licence agreement on Hugging Face. Machines also differ a lot from one to the next, so expect a spread, not one number.
One student's assignment, step by step
- You issue a code for the nest (a version of your setup) and send it to the student. A hand-off is a code, not a public link: nothing is listed anywhere.
- The student claims it into their own drive. No files are copied: the claim records that the nest is theirs.
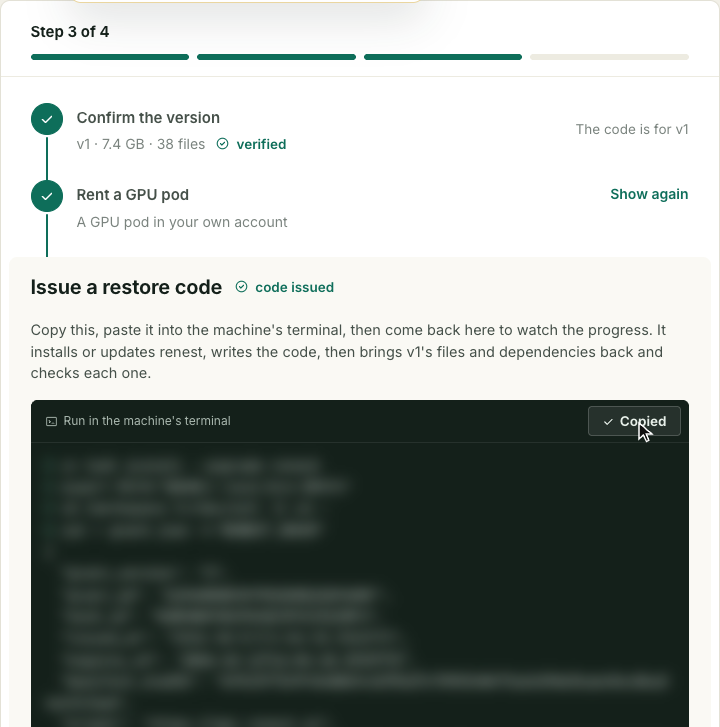
- The student rents a machine from the template, opens the restore page in the console, signs a restore code of their own and pastes the command into the machine's terminal.
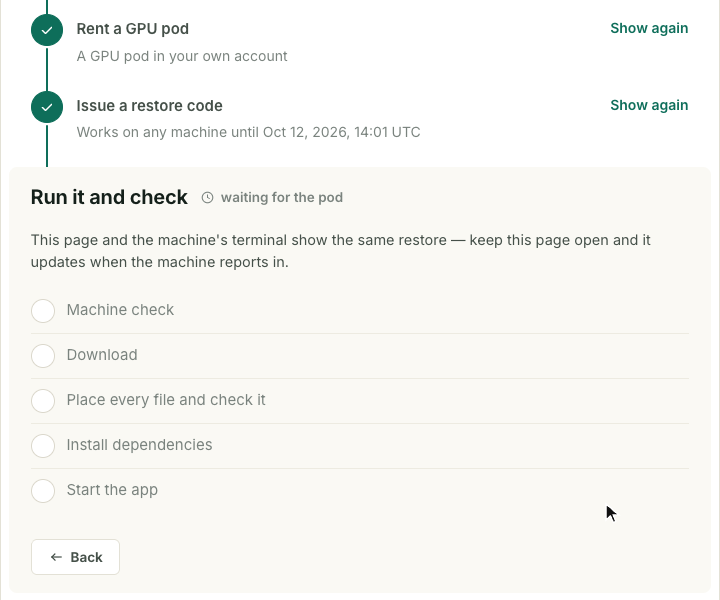
- The restore checks the machine, brings the files and dependencies back, checks them, starts the app and runs the workflow once.
Two of those screens in the console, as a student sees them. In step 3 the student copies one command (blurred here, because it contains their code) and pastes it into the machine's terminal:
In step 4 the page and the terminal show the same restore, and the five stages tick off as the machine reports in:
Limits to know before you pick a plan
These are the numbers on the pricing page; check it for the current ones.
- Students need no paid plan to claim. The free plan has storage for nests you claim: 20 GB. If a claim would push a student over that, it is refused with a message that their storage is full. A file that is already in the student's drive counts once.
- That is the design hint for a course: pick one base model for the whole course and change only the LoRA, the workflow and the input images between assignments. The base model is stored once per student, and later assignments add only what's new.
- You need a paid plan to send. How many codes you can send a month, and how many people can claim one code, depend on the plan: Plus 5 codes a month with up to 5 people each, Pro 30 codes with up to 20 people each, Max 300 codes with up to 100 people each. A class of 30 on Pro needs two codes per assignment; on Max, one is enough.
- A code can be revoked and you pick how long it stays valid.
Which plan fits which class
Only the sender needs a paid plan. What matters is how many students share one code, and how many codes you can send in a month. We leave the prices to the pricing page.
| Class size | Plan that covers one code per assignment | Assignments a month at that size |
|---|---|---|
| Up to 5 students | Plus | 5 |
| Up to 20 students | Pro | 30 |
| Up to 100 students | Max | 300 |
If the class is bigger than one code allows, you send more codes per assignment and the monthly allowance goes further down. A class of 30 on Pro takes two codes per assignment, so about 15 assignments a month. A class of 12 on Plus takes three codes per assignment, so one assignment a month, and Pro is the better fit. On the free plan you can't send at all, though your students can claim for free.
Models that can't be handed over
A model whose licence doesn't allow passing it on is never given to a student from Renest's storage. The student fetches it from its original source with their own account. For a model that needs a click on Hugging Face to accept an agreement, the student has to do that first, and has to have a Hugging Face token configured on the machine. When you pack, give the download address for such files; if the nest has no address for a file, the student's restore stops before the big download and lists the file with its checksum and the path to put it at, and the student has to find it themselves. See What happens when a file can't travel.
Three things we'd do
- Fix one base model for the whole course. Everything else rides on top of it.
- Spend the first lesson on setup. Signing up, adding credit to the GPU account and accepting any agreements, once, with you in the room.
- Pick the plan from the biggest class, not the average. If more than 20 students will claim the same code, the per-code limit decides which plan you need.
What we haven't measured
How long a first-time student takes to sign up, set up billing on a GPU platform, or accept a model agreement. Whether thirty students downloading at the same time slow each other down. Anything about a real class: no teacher or student has used Renest this way yet. The times above are from one run on one machine type, and the machine spread we have seen is wide.